Meta Business Manager is the foundation of every successful Facebook and Instagram advertising strategy. Whether you’re a startup founder, digital marketer, or creative strategist, understanding how to set up and use Meta Business Manager is essential for running secure, scalable, and high-performing ad campaigns.
In this guide, we’ll walk you through the entire setup process—from account creation to asset management—so you can confidently launch your Meta Ads and build a strong digital presence.
📌 What Is Meta Business Manager?
Meta Business Manager is a free tool provided by Meta (formerly Facebook) that allows businesses to manage their Facebook Pages, Instagram accounts, ad accounts, pixels, catalogs, and team permissions—all in one centralized dashboard.
🔐 Why You Need It:
- Keeps your business assets secure and separate from personal accounts
- Enables collaboration with agencies, freelancers, and team members
- Simplifies ad account management and billing
- Provides access to advanced tools like Meta Pixel, Events Manager, and Commerce Manager
Whether you’re running ads for one brand or managing multiple clients, Meta Business Manager is the control center for all things Meta Ads.
🛠️ Step-by-Step: How to Set Up Meta Business Manager
Let’s break down the setup process into clear, actionable steps.
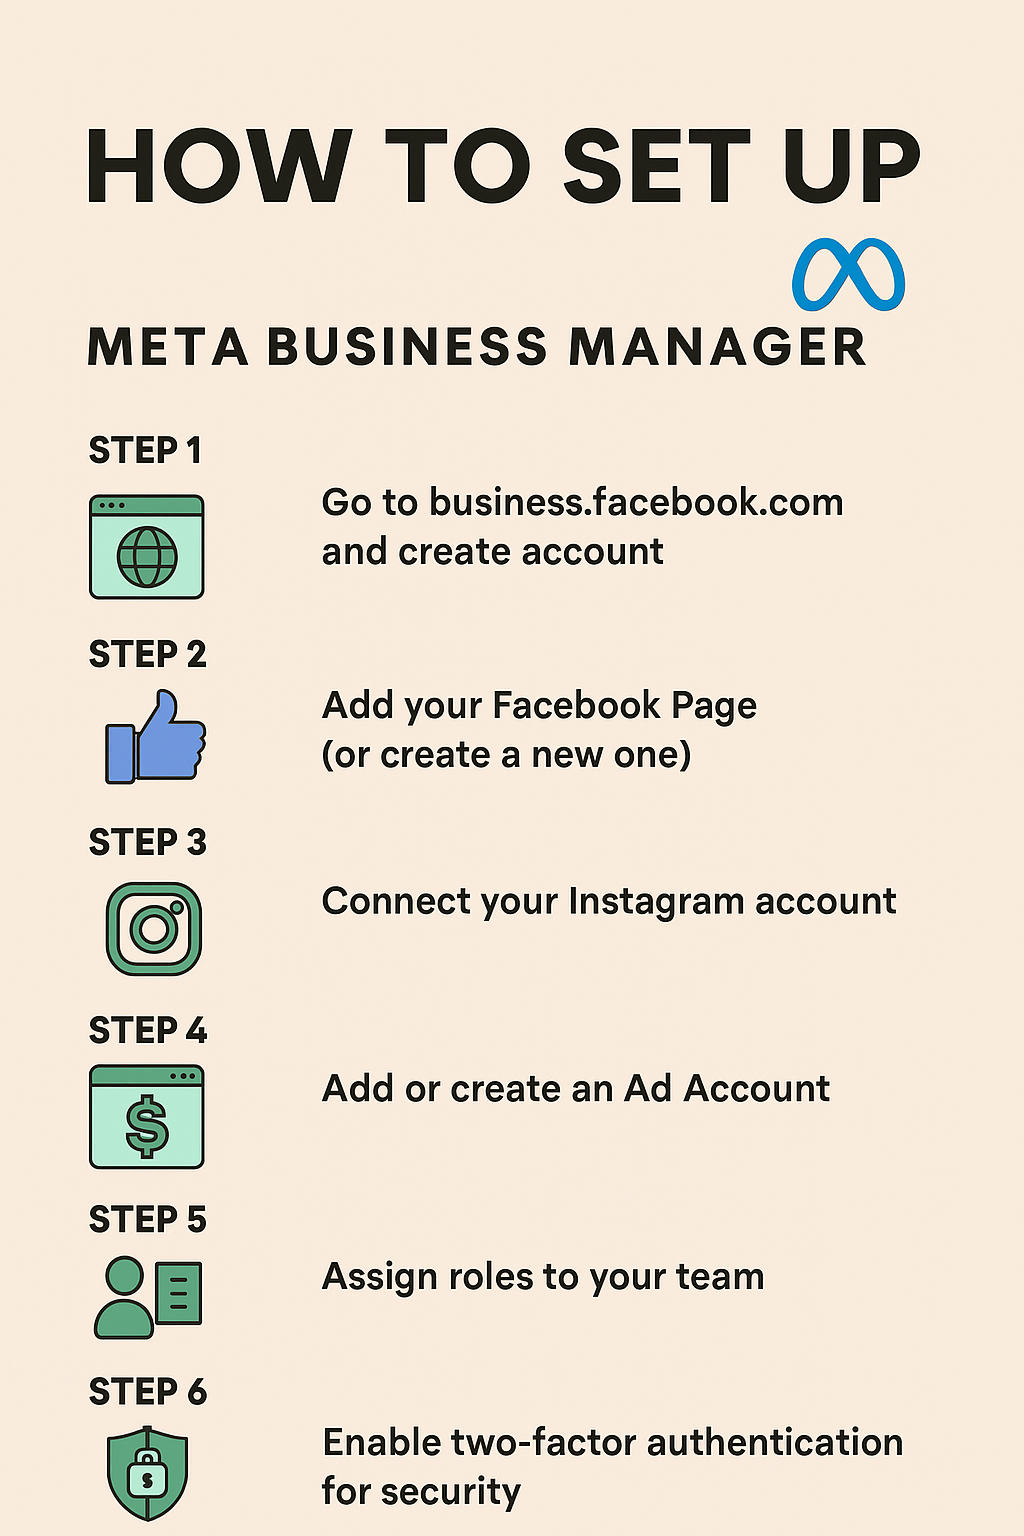
1. Create Your Business Manager Account
- Visit business.facebook.com
- Click “Create Account”
- Enter your business name, your name, and your business email
- Click “Submit”
Pro Tip: Use a professional email address (e.g., hello@yourbrand.com) to build trust and avoid verification issues later.
2. Add Your Facebook Page
Once your Business Manager is created, you need to connect your Facebook Page.
- Go to “Business Settings”
- Click “Accounts” → “Pages”
- Choose one of the following:
- Add a Page (if you own it)
- Request Access to a Page (if a client owns it)
- Create a New Page (if starting from scratch)
Note: You must be an admin of the Page to add it directly.
3. Connect Your Instagram Account
To run ads on Instagram, you need to link your account.
- In “Business Settings,” go to “Accounts” → “Instagram Accounts”
- Click “Add” and log in to your Instagram account
- Authorize access and confirm connection
Tip: Make sure your Instagram account is a Business or Creator account—not personal.
4. Add or Create an Ad Account
Your ad account is where campaigns are created, budgets are managed, and performance is tracked.
- Go to “Business Settings” → “Accounts” → “Ad Accounts”
- Choose:
- Add an Ad Account (if you already have one)
- Request Access to an Ad Account (for client accounts)
- Create a New Ad Account
When creating a new ad account:
- Name it clearly (e.g., “Socialtacts India Ads”)
- Set your time zone and currency correctly
- Assign people and permissions
Beginner Tip: Start with one ad account per brand to keep things organized.
5. Assign Roles and Permissions
Meta Business Manager allows you to add team members and control what they can access.
- Go to “Users” → “People”
- Click “Add” and enter their email address
- Assign roles:
- Admin – Full access
- Employee – Limited access (e.g., ad creation only)
- Finance Analyst – View billing and transactions
Best Practice: Only give Admin access to trusted team members. Use role-based access to prevent accidental changes.
6. Set Up Your Payment Method
To run ads, you need to add a payment method.
- Go to “Payments” in Business Settings
- Click “Add Payment Method”
- Choose credit/debit card, UPI, or PayPal (based on region)
- Enter billing details and save
Tip: Use a business card for better tracking and accounting.
7. Enable Two-Factor Authentication
Security is critical—especially when managing ad budgets and sensitive data.
- Go to “Security Center”
- Require two-factor authentication for all admins
- Use SMS or authentication apps like Google Authenticator
This protects your account from unauthorized access and phishing attempts.
📦 Optional: Add More Business Assets
Once your core setup is done, you can add additional assets:
Meta Pixel
- Track website visitors and conversions
- Retarget users with Custom Audiences
- Optimize campaigns for purchases, sign-ups, etc.
Catalogs
- Showcase products in dynamic ads
- Connect with Commerce Manager for Instagram Shopping
Apps
- Promote app installs and in-app events
Domains
- Verify your website domain for ad tracking and brand safety
🧠 Understanding Meta’s Asset Hierarchy
Meta Business Manager uses a layered structure:
| Layer | Description |
|---|---|
| Business Manager | The umbrella account |
| Pages & Instagram | Your social profiles |
| Ad Accounts | Where campaigns are created |
| Pixels & Catalogs | Tracking and product data |
| Users | People with access |
This hierarchy helps you manage multiple brands, clients, or campaigns without mixing assets.
📊 Common Use Cases
For Startups:
- Manage your brand’s Facebook and Instagram presence
- Run ads to drive traffic, leads, or sales
- Collaborate with freelancers or agencies
For Agencies:
- Request access to client Pages and Ad Accounts
- Assign roles to team members
- Track performance across multiple brands
For Freelancers:
- Keep client assets separate from personal accounts
- Request limited access to run ads
- Build trust with professional setup
🧭 Troubleshooting Tips
- Can’t add a Page? You may not be an admin—check Page roles first.
- Payment method rejected? Try a different card or contact your bank.
- Instagram won’t connect? Switch to a Business account and retry.
- Pixel not firing? Use Meta’s Pixel Helper Chrome extension to debug.
🔄 What’s Next in Your Meta Ads Journey?
Now that your Business Manager is set up, you’re ready to launch your first campaign. Head over to our next guide in the Meta Ads 101 series:
👉 Meta Ads 101: A Beginner’s Guide to Campaign Setup
🧠 Final Thoughts
Setting up Meta Business Manager is more than just a technical step—it’s the foundation of your entire advertising strategy. A well-organized Business Manager ensures security, scalability, and collaboration, whether you’re running ads for one brand or managing dozens of clients.
Take the time to set it up right, and you’ll save hours of troubleshooting later. Bookmark this guide, share it with your team, and revisit it whenever you onboard a new client or brand.